VideoView in Android Studio is used to Display video in Android applications with the help of MediaController and VideoView classes. So, Inside this article, you will learn how to create a simple Video Playing application and how to use classes of VideoView and will clear all the concepts of VideoView in Android Studio.
android. widget.MediaController: It is a View that contains Media Controls like
- Play
- Pause
- Previous
- Next
- Fast-forward
- Rewind
You can also watch YouTube videos from our YouTube channel to implement VideoView in Android Studio.
Steps for implementing VideoView in android
So, to create a simple application that displays a video. Follow the following steps.
Loading Video From URL
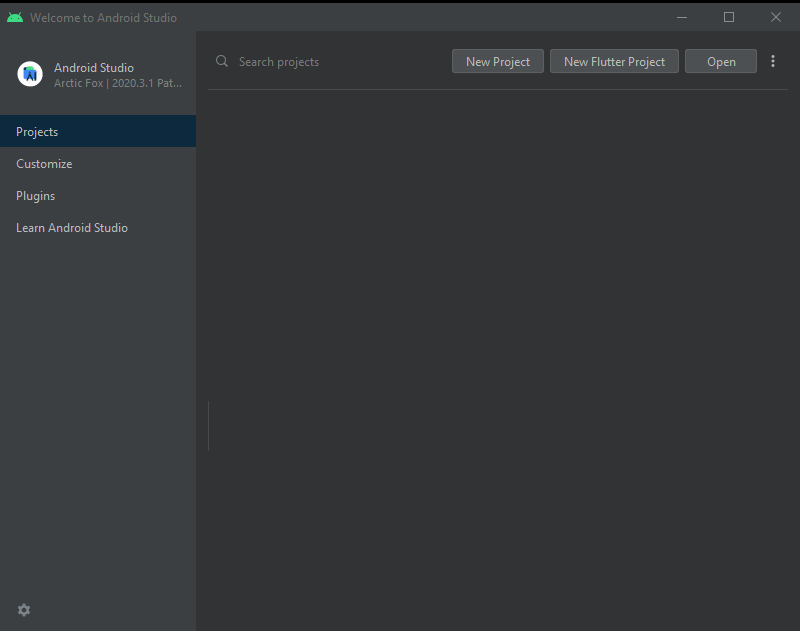
- So, First of all, Create a New Project by simply opening up Android Studio and clicking on the “New Project” button.
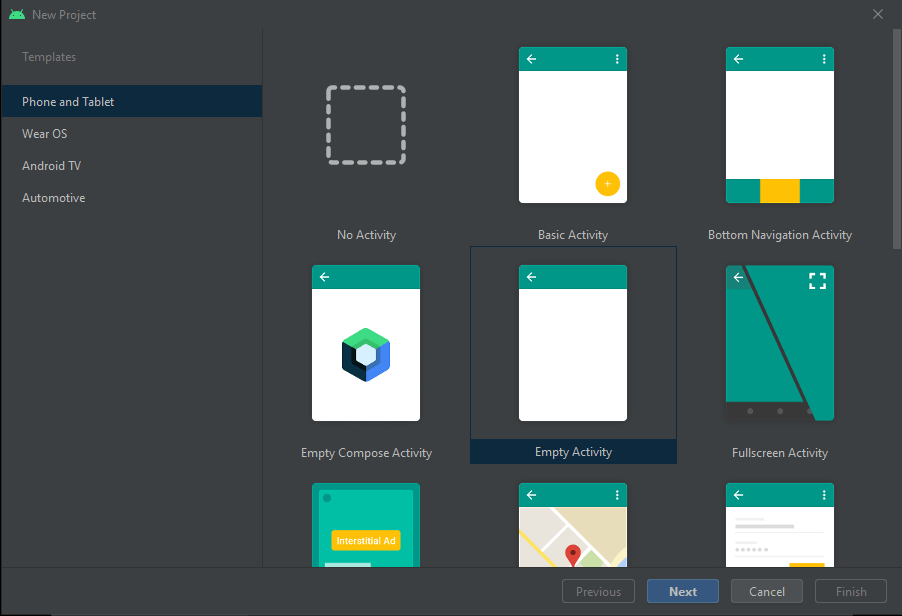
2. So, Now Select Empty Activity as Application Activity.
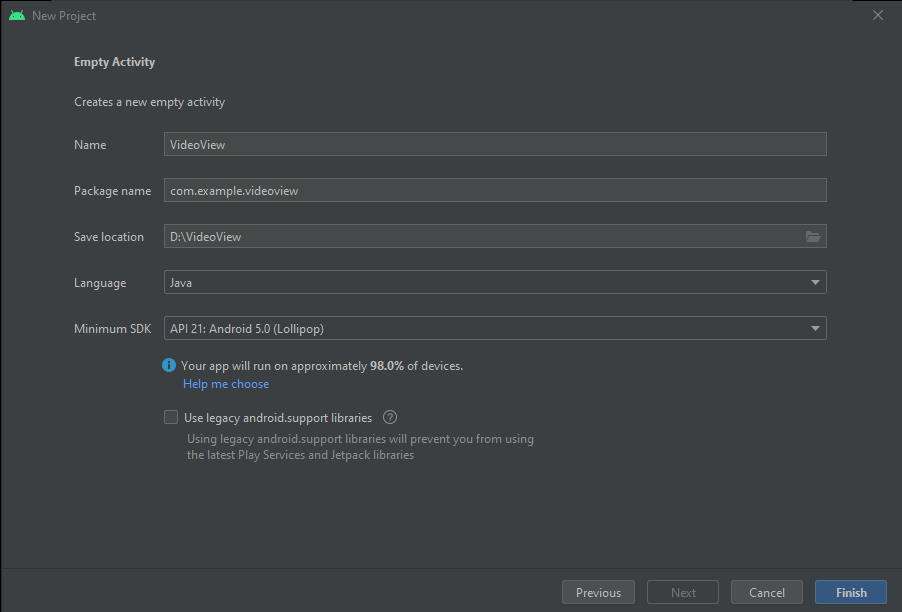
3. Next give the name to the application and select the location where to store files of the application. Also, select the Minimum SDK version of the Android Application.
4. So, Open the activity_main.xml file of the res folder. And create a Frame Layout that will contain VideoView Attribute.
<FrameLayout
    android:layout_width="match_parent"
    android:layout_height="wrap_content">
</FrameLayout>
5. So, now place the VideoView tag inside Frame Layout.
<FrameLayout
    android:layout_width="match_parent"
    android:layout_height="wrap_content">

    <VideoView
        android:layout_width="match_parent"
        android:layout_height="wrap_content"
        android:id="@+id/video"/>

</FrameLayout>
Give ID to the VideoView as “video” for further use.
6. So, Open MainActivity.java (java>com.example.VideoView>MainActivity.java) file and create an object for VideoView. And initialize VideoView.
VideoView videoView;
    @Override
    protected void onCreate(Bundle savedInstanceState) {
        super.onCreate(savedInstanceState);
        setContentView(R.layout.activity_main);
        videoView = findViewById(R.id.video);
7. So, to use VideoView we have MediaController to use it create the object for MediaController.
MediaController mediaController = new MediaController(this);8. Now set the Media player and set Media Controller for Media View.
mediaController.setMediaPlayer(videoView);
videoView.setMediaController(mediaController);
9. Now give the URL of the video that you want to display on the Android Application.
videoView.setVideoURI(Uri.parse("https://demo.codeseasy.com/video/Big_Buck_Bunny.mp4"));The complete MainActivity.java file will look like the below file.
package com.example.videoview;

import androidx.appcompat.app.AppCompatActivity;

import android.net.Uri;
import android.os.Bundle;
import android.widget.MediaController;
import android.widget.VideoView;

public class MainActivity extends AppCompatActivity {

    VideoView videoView;
    @Override
    protected void onCreate(Bundle savedInstanceState) {
        super.onCreate(savedInstanceState);
        setContentView(R.layout.activity_main);
        videoView = findViewById(R.id.video);
        //Create object for media Controller
        MediaController mediaController = new MediaController(this);
        //set media player
        mediaController.setMediaPlayer(videoView);
        //Set media Controller for media View
        videoView.setMediaController(mediaController);
        //set Video URL
        videoView.setVideoURI(Uri.parse("https://demo.codeseasy.com/video/Big_Buck_Bunny.mp4"));
    }
}
So, there is two option to display Video
- By giving the URL from Internet resources.
- From local machine.
Both have a little bit different implementations if you are using URLs from the Internet then some changes in AndroidMenifest.xml must be done.
<uses-permission android:name="android.permission.INTERNET"/>
<application

        android:usesCleartextTraffic="true"
        android:allowBackup="true"
        android:icon="@mipmap/ic_launcher"
        android:label="@string/app_name"
        android:roundIcon="@mipmap/ic_launcher_round"
        android:supportsRtl="true"
        android:theme="@style/Theme.VideoView">
        <activity
            android:name=".MainActivity"
            android:exported="true">
            <intent-filter>
                <action android:name="android.intent.action.MAIN" />

                <category android:name="android.intent.category.LAUNCHER" />
            </intent-filter>
        </activity>
    </application>
So, The first line of the above file refers that asking for users’ permission for access to the INTERNET. And setting ClearTextTraffic to true.
Output:

So now let us use video from the android resource folder.
Loading Video From Android Resource Folder
1. So, NowGo to the resource directory and create a new “raw” folder.
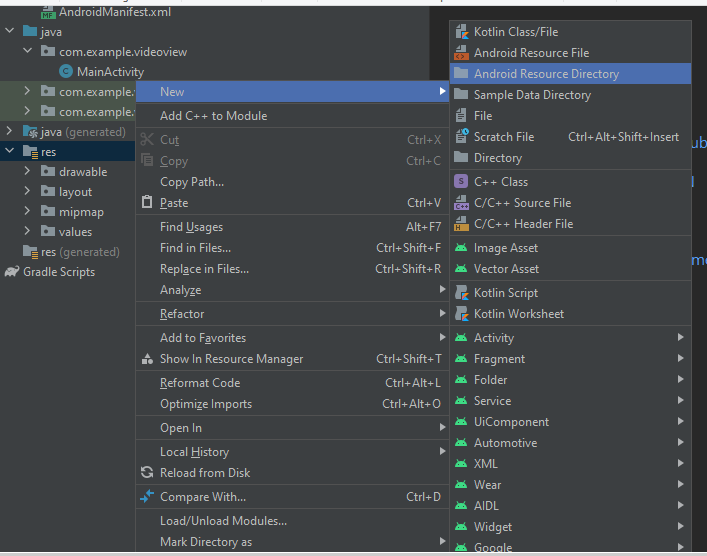
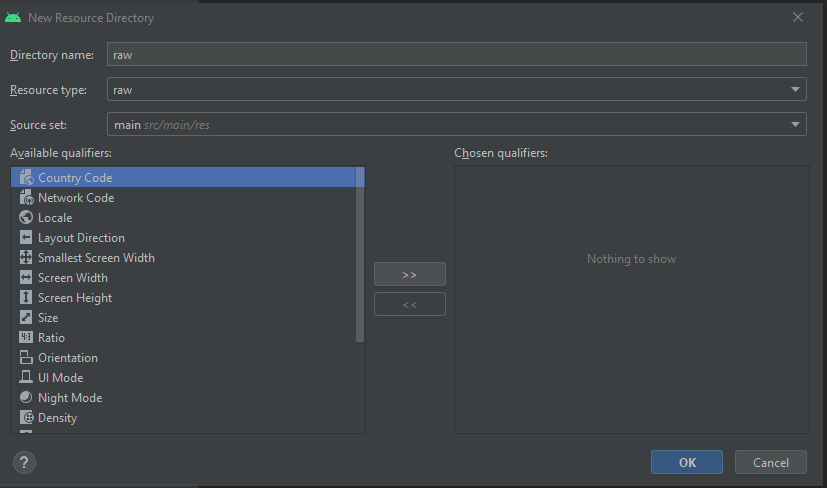
Now drop your video inside the raw folder. Make sure that the video name must be in lowercase letters and that no space is used for the file name. We have named it just video.mp4
So, now load the video to the application by changing the URL.
videoView.setVideoURI(Uri.parse("android.resource://"+getPackageName()+"/"+R.raw.video));And now run Application
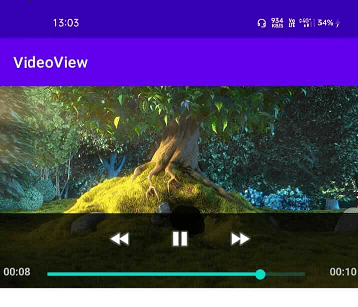
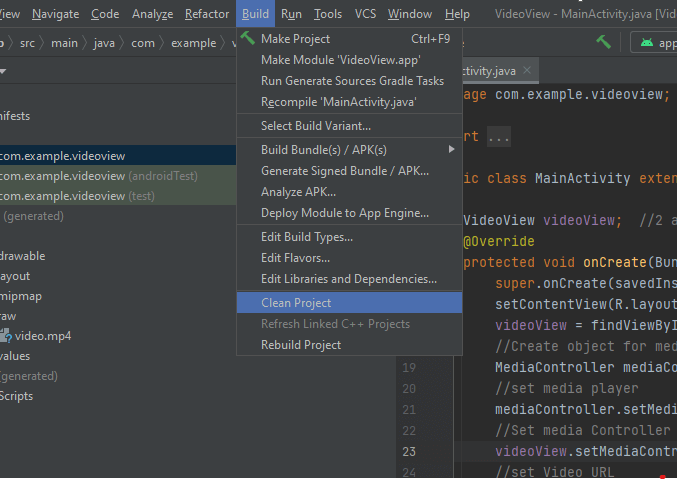
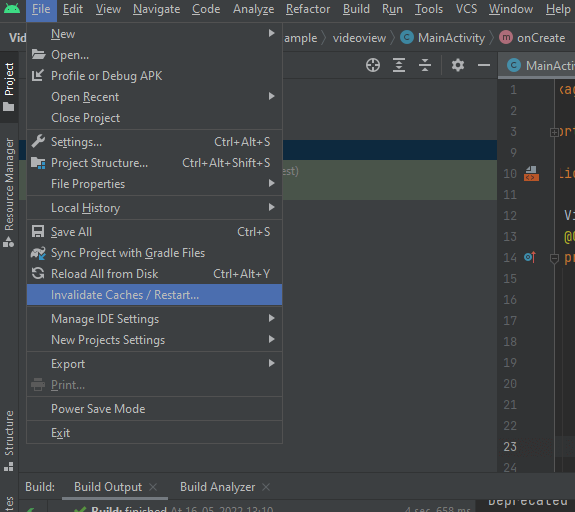
During this, an error may occur due to some issues, that error can be tackled by following two steps.
step 1. Clean the project. Build>Clean Project
step 2. Invalidate Caches and Restart Android Studio. File>Invalidate Caches / Restart Android Studio
In this article, we have seen how to implement VideoView in Android studio by two methods by internet URLs and from local machines, and How to use MediaController with its classes.
